December 29, 2012

Three-Minute Cranberry Galette


Today was a pie-making day. And I had a special friend to keep me company.


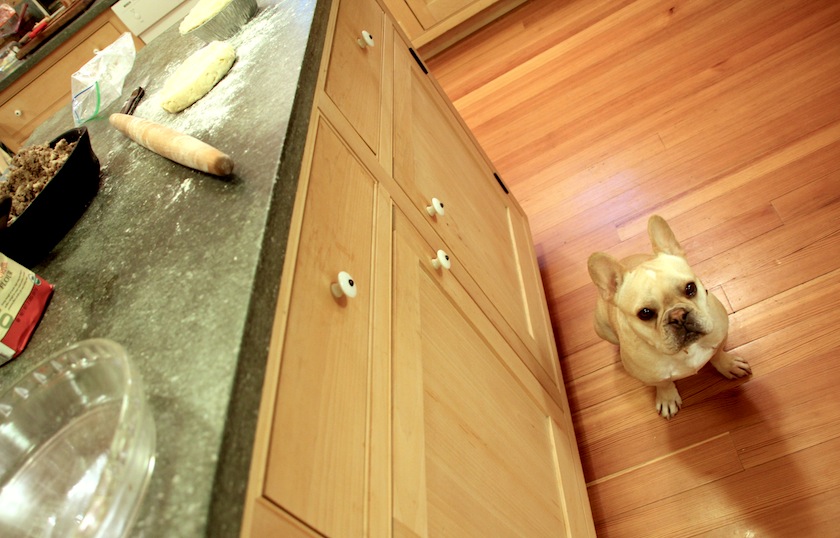
Her name is Eloise. She is a guest with us for a few days and I have fallen head over heels in love with her. Now, take a deep breath before you look at the next picture.
Look at that FACE! Although I like to think of myself as more of a big dog person, as you may remember, it's not the first time a little dog has captured my heart. At any rate, everytime I looked down from pie-land, there was Eloise, sitting very quietly and very very close. 

I started off the day making tourtière, a traditional Québecois meat pie eaten around this time of year (think of a mountain of spiced ground pork and beef in a buttery pie crust, not for the faint-hearted). I'll share the recipe with you next year when I am off my "video sabbatical" because it's a video-worthy one. Since I was following a recipe yielding 6 meat pies (yes, Quebecers used to have BIG families!) and I only made 2 pies, I ended up with extra pie dough. Convenient since there was a sad bag of cranberries and some squash sitting in the fridge, begging to be used up. The squash pie was nothing to write home about. But the cranberry galette was delightful and since I have a feeling I'm not the only one with a spare bag or two of cranberries leftover from Christmas, I thought I'd share this recipe, which is a long-time favourite of mine and just about the easiest dessert I know how to make. It literally takes 3 minutes to prepare (minus the pie dough).


3-MINUTE CRANBERRY GALETTE

1 batch of your favourite pie dough (ideally a very buttery & flaky one)
About 2 to 3 cups of cranberries
About 1 cup cane sugar (the cranberries are quite tart and need the sugar)
1 tbsp butter

Roll out the pie dough. Place on a greased cookie sheet. Place your washed and dried cranberries in a mound on the pie crust. Sprinkle the sugar all over. Fold the edges of the dough towards the centre, leaving a circle of cranberries poking through (about 3 to 4 inches in diameter). Tuck the tablespoon of butter on top of the cranberries. Bake in a 350 F oven until cranberries are bubbling and crust is golden, about 30 minutes. Serve warm with a dollop of crème fraiche.


Best enjoyed with a friend by your side.


December 23, 2012

Egg Nog Crème Brûlée

Egg nog is one of those heavenly things. And by golly, so is crème brûlée. I recently had a brain explosion when I realized you can put the two together. Actually, I have to confess that up until very recently, I didn't think crème brûlée was easy to make at all. Although I love making custards and crème caramel and basically anything with cream and eggs, I have had crème brûlée block all of my life up until now. Weird, considering my obsession with French cooking, and my French Canadian roots. It's because I don't have one of those little chef blow torches to burn the sugar. And even if I did, torches freak me out just a little bit. But I just clued in to the fact that you can simply burn the sugar under your oven grill. Dah dah dah. My life has been transformed. Now unfortunately, this means I went a little sugar-burning happy, as you can see in the photo. You only need to caramelize the sugar until it is golden and bubbling with a few flecks of black. Still, a very burnt sugar crust is also delicious.


Now here's a little French trivia for you: crème brûlée means burnt cream. And egg nog in French is "lait de poule", which literally translates as hen's milk. So I have been enjoying referring to my brûlée as HEN'S MILK BURNT CREAM!

On another note, it was recently suggested to me that I should provide an explanation for the absence of videos on this blog as of late. Well, I have been on the road a lot recently as I am in the process of leaving my job in Toronto and moving into a new phase of my life (one that will involve much more cooking and farming and video-making, so do stay tuned in 2013... ).  In the meantime, I have been living in various extremely kind people's homes (and kitchens) and taking a little break from video-making. So I leave you with a re-run of my Christmas video from last year and my warmest wishes to you and yours for a relaxing, joyful, and delicious holiday season. See you in the new year!


EGG NOG CRÈME BRÛLÉE

2 cups (500 ml) heavy cream (35% whipping cream)
6 egg yolks
1/3 cup fine cane sugar
1 tsp vanilla
1 tbsp. rum
1 1/2 teaspoon freshly grated nutmeg

*1/3 cup superfine cane sugar for the topping (caster sugar)


*The best sugar for burning under the grill is superfine sugar. It can be hard to find it but it's easy to make at home. Simply put the sugar in a blender of food processor and pulse until the sugar is fine but not powdery.


In a large mixing bowl, beat the egg yolks and sugar until silky and ribbony. Add rum, vanilla, and nutmeg and whisk well. 


In a small saucepan, gently heat the cream on low until just before it boils. While whisking continuously, pour the cream onto the egg mixture. Don't stop whisking until it starts to thicken a bit (this signals that the eggs are starting to cook). 


Pour into small individual ramekins (or one large one). Place these on a baking pan filled with enough water so that it comes up to halfway up the exterior of the ramekins. Bake in this water bath for about 45 minutes at 300 F. It should be set but still quite wobbly. Cool the custard to room temperature (chill it in the fridge if not using right away). 


When ready to serve, if removing from the fridge, allow ramekins to come up to room temperature for a few minutes. Using a clean cloth, pat the surface dry of any condensation. Sprinkle about one teaspoon of your fine sugar to evenly cover the surface of each custard. Place under broil on the highest possible rack in the oven. Broil for about 5 to 10 minutes, rotating the ramekins a couple times to ensure even caramelization. An upside-down pan can also be used to bring the custards even closer to the top grill to speed up the process. Be careful not too over-burn, once the caramel is golden and bubbling, remove from the oven and allow the sugar to harden and cool slightly before serving. Can be served hot or cold.

December 17, 2012

Brussels Sprouts Gratin in Cream and Blue Cheese

This recipe is so decadent it might win over even the most adamant brussels sprouts hater. It's also a great holiday dish (I like to sprinkle pomegranate seeds on mine for a festive presentation) and it's a loose adaptation of a recipe from my first-ever food blog crush, Orangette, which I remember discovering back in the day when I didn't even know what a blog was. Molly Wizenberg is one of my all-time favourite writers and I love when she describes how her stomach "literally coos like a baby" at the thought of cream-braised brussels sprouts and that she could "lap up a plate of this stuff like a cat with a bowl of milk". Besides, how can one resist trying the recipe that turned her from a cream-hater to a cream-lover? 

I decided to turn my version into a gratin with the addition of blue cheese because I've always loved the deep flavour it adds to creamy sauces. I used Castello blue cheese which I recently learned is GMO-free (hurrah!). I opted for their "mellow blue cheese" and found it to be velvety and not too overpowering in this dish.

This summer, my boyfriend and I grew green and purple brussels sprouts in our garden. I had never seen the purple kind before, they are quite dashing! Those brussels sprout plants are now the last soldiers standing in our garden, which has for the most part been put to bed for winter. They are bravely withstanding the cold wintery winds of mid-coast Maine, and patiently waiting to be harvested for Christmas dinner. I miss those little guys (and the tall human guy who planted them too, I miss him a LOT). But since I am still in the city, and I wanted to bring this dish to a dinner party yesterday, I had to suck it up and buy my brussels sprouts at a store. (gasp!) But in just a few days time I'll be back in Maine and I can't wait to make this recipe again with my own homegrown purple brussels sprouts and my sweetheart by my side!


BRUSSELS SPROUTS GRATIN IN CREAM AND BLUE CHEESE
Adapted from Molly Wizenberg's Cream-Braised Brussels Sprouts

(Feeds 6 to 8 hungry people)

2 pounds brussels sprouts
1/4 cup white wine
1 1/2 cup heavy cream
2/3 cup crumbled blue cheese
1/2 cup grated parmesan

Wash and trim the brussels sprouts and cut them in half. In a medium pot, cook the brussels sprouts in the wine on medium heat for about 5 minutes or until all the wine is gone (watch closely that they don't burn). Transfer them and into a buttered baking dish. Crumble the blue cheese and pour the cream on top. Add the grated parmesan. Bake covered in a 350 F oven for about 30 minutes. Remove the lid and bake for another 10 minutes or until top is golden. If you want a darker top, you can broil it for the last minute but I over-broiled mine slightly, so don't burn it like I did, one single minute of broiling should be plenty! Garnish with pomegranate seeds if desired.

*One little eco-cooking tip: I try to avoid using aluminum foil whenever I can, if you don't have a lidded baking dish, simply put a cookie sheet on top of the pan to cover it up without using aluminum foil.

December 04, 2012

Almond & Apple Butter Thumbprint Cookies (gluten-free!)

For me, getting in the mood for Christmas involves baking copious amounts of cookies. As a kid, around this time of year, I would get on the greyhound bus to spend a weekend with my cherished Grammie and we would bake cookies from the moment I arrived until the moment I left. It was our annual Christmas baking bonanza and I had her all to myself, a rare treat! As we piled tin after tin of cookies into the secret "Christmas cookie cupboard", we would listen to carols and get into a festive spirit. One of my grandmother's favourites, a family classic, were her thumbprint jelly cookies, or as they are also called, bird's nest cookies: a nutty cookie with a jelly-filled indentation in its centre. Recently, I've been hanging around some gluten-free friends, and I wanted to adapt these for them, putting to use some of the apple butter I made this fall.


I imagined a chubby, almondy cookie and after a couple of batches, I got what I had aimed for: a healthy holiday cookie that is crispy on the outside and chewy on the inside, deliciously flavourful, and gluten-free and sugar-free (sweetened only with maple syrup and apple butter).


Did you know how easy it is to make apple butter?! I made it for the first time this fall, using the most basic recipe I could find. I simply cooked down a huge pot full of chopped apples for almost a whole day on the woodstove until they went beyond the apple sauce stage and crossed over into that thick dark caramelly world of apple butter. Add a few sprinkles of cinnamon and cloves and voila. Spread it on buttered toast in the morning and it will win you over.


I'm lucky that my family lives near an abandoned orchard in Nova Scotia and every fall, we have a tradition of rescuing these lonely apples from falling to the ground, unused.


They're free, they aren't sprayed with pesticides, and they make the most exquisite (a bright rosy pink!) apple sauce. How much better can it get? Now that I'm back in the big city for a bit, I treasure the jars of apple sauce and apple butter I brought here with me, they taste like the East Coast and the wind and the leaves and sunshine back home.


Now before I share this recipe, I have a special treat for you that will warm your heart and give you a chuckle. (And also fulfills the promise I made of sharing cute animal videos with you when I don't have time to make cooking ones). So. Dogs need cookies too, especially around the holidays, and my friend Val has just put up a fabulous blogpost sharing a winning doggy biscuit recipe (just in time for a fun homemade Christmas present for all your canine friends). I happened to be there with my camera when she gave her spirited pups, Cracker and Mash, their first tastes of biscuit, fresh out of the oven. And here is what that looked like:


I can only hope that biting into my almond cookies will generate a fraction of the exuberance displayed by Cracker and Mash. Please do make these and let me know if you did a happy dance :-)


CHEWY GLUTEN-FREE ALMOND THUMBPRINT COOKIES

Makes 20 medium-sized cookies
*Feel free to substitute your favourite jam or jelly for the centre part.

1 1/2 cup ground almonds (almond flour)

1/3 cup butter, at room temperature (I used goat butter, my new favourite butter)
1/2 cup maple syrup (more to taste)
1 egg
1 1/4 cup brown rice flour
1/4 cup tapioca (or arrowroot) flour
1/2 tsp. baking soda
1/2 tsp. salt
1 tsp. almond extract
1 tsp. cinnamon
About 1/3 cup apple butter (or your favourite jam or jelly)
About 20 almonds to decorate the cookies

Mix the ground almonds and butter together, then add the maple syrup, beaten egg, and almond extract. Mix all the dry ingredients together in a separate bowl and incorporate into the wet almond mixture. Mix until smooth. Chill in the fridge for 30 to 60 minutes. Roll into balls and flatten them slightly on a greased cookie sheet. With your thumb, make an indentation in each cookie. Place about 1 tsp apple butter (or jelly / jam) in each indentation and top it off with a whole almond. Bake at 350F for about 15 minutes or until the edges are crisp but the centre still soft. Let them cool on the pan a few minutes before transferring to a cooling rack.